
Project Management
The Project Management module is your command center for tracking every booth build from start to finish. From here you can create new projects, monitor active shows, and see what's coming up next.
Open the module
From the main dashboard, click the Project Management card.
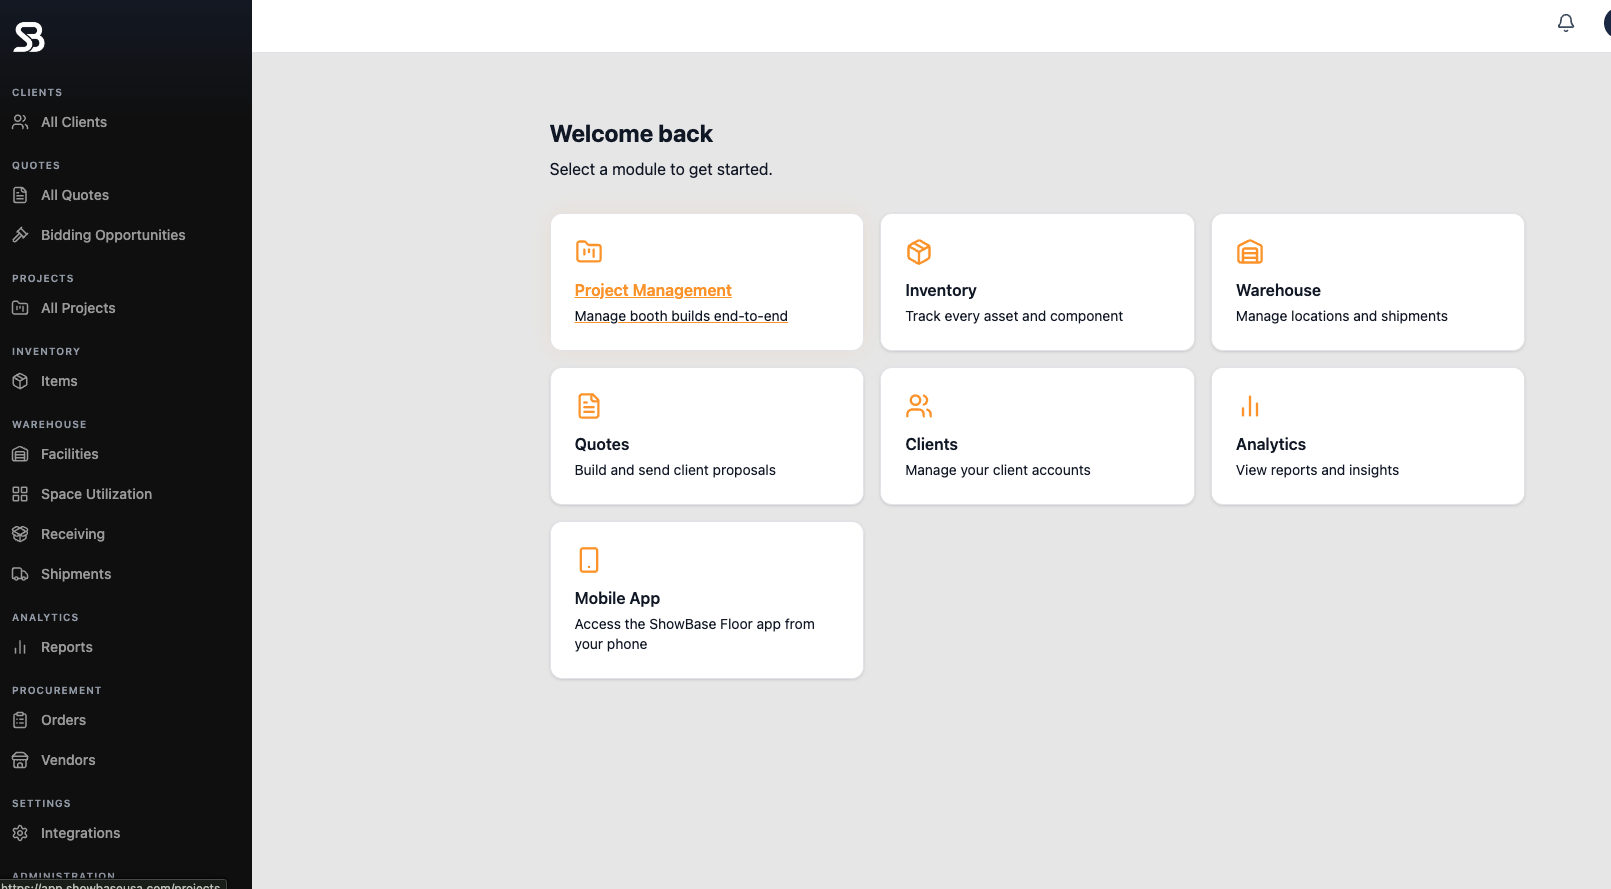
What you'll see next
You'll land on the Projects page, where all your shows live — organized by Active, Upcoming, and Completed.
💡 Tip: New to ShowBase? This page will be empty at first — that's normal. Head to the next article to create your first project.
How to Create a New Project
Creating a project is the starting point for every booth in ShowBase. Follow these steps to set one up correctly the first time.
Open Project Management
Click the Project Management card from the dashboard. This automatically takes you to All Projects, showing every active and existing project.
If you're a new user with no projects yet, this list will be empty — that's expected. Click Create Project to create your first one.
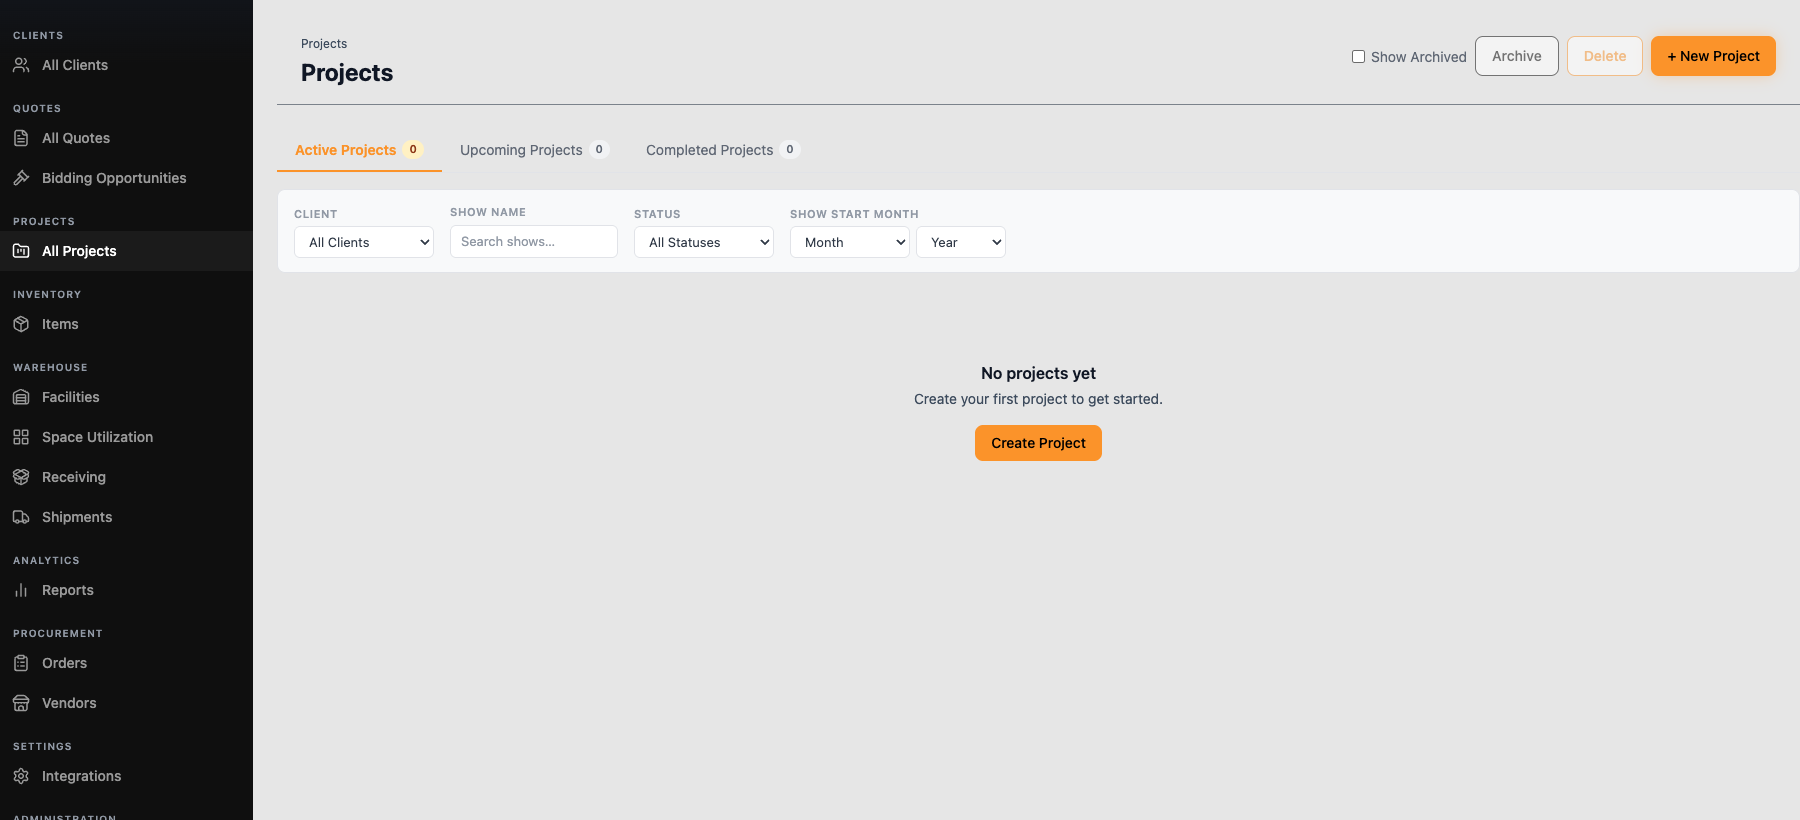
Enter the Project Name and select a Client
Type the Project Name, then click into the Client field. First time using ShowBase? Your client list will be empty too — that's normal. Click + Create new client... at the bottom of the dropdown to
add one on the spot.
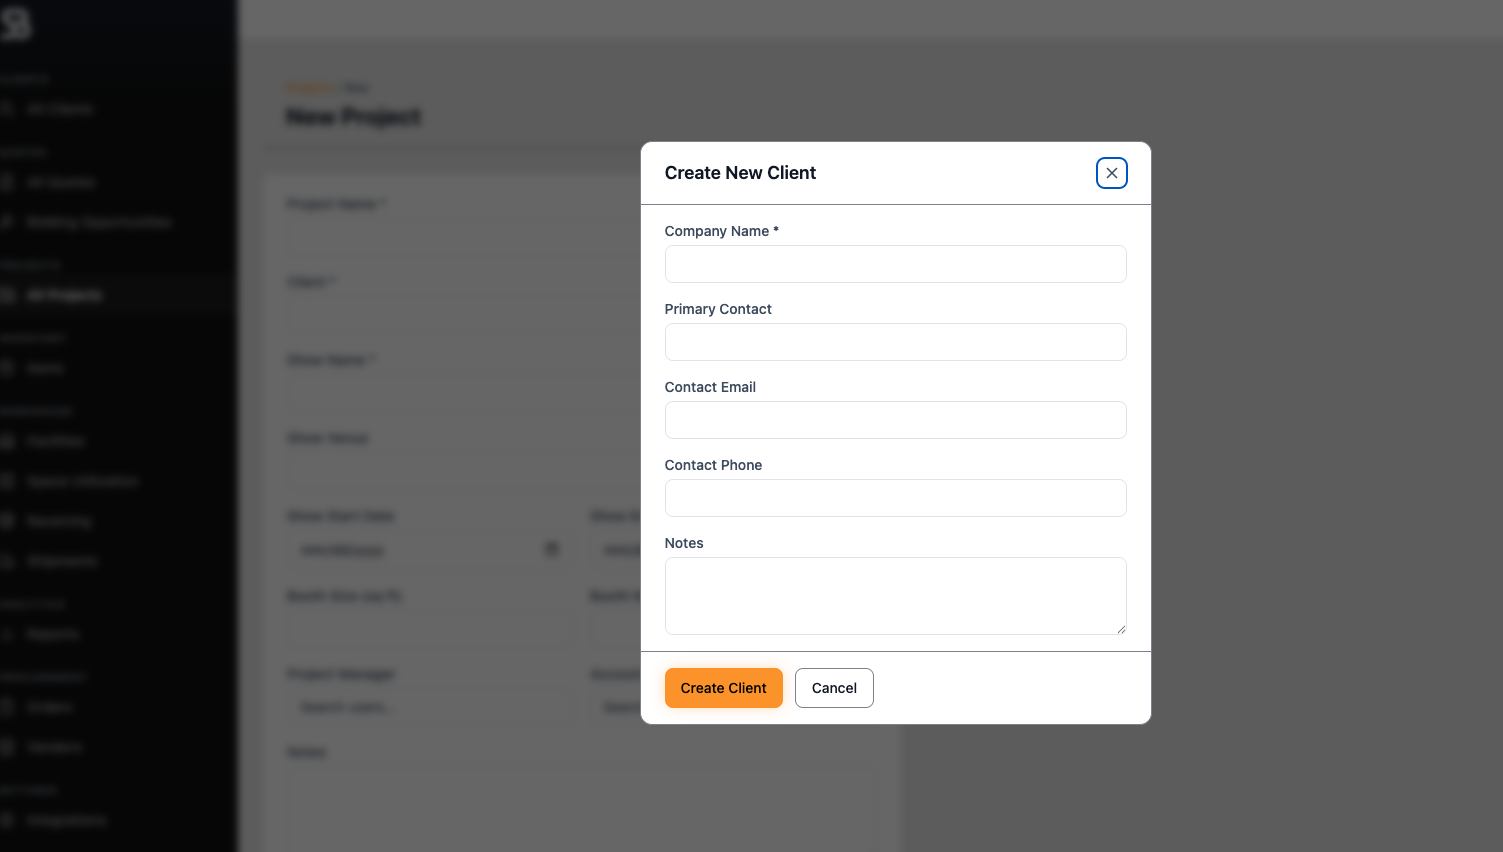
*Fill in the new client's details
A window will pop up asking for the client's info: Company Name (required), Primary Contact, Contact Email, Contact Phone, and any Notes. Click Create Client when done — you'll be brought right back to your project form, with this client now selected automatically.
Select or create the Show
Click into the Show Name field. ShowBase pulls from a built-in database of common trade shows (CES, NRF Big Show, etc.) — start typing and select a match if you see one.
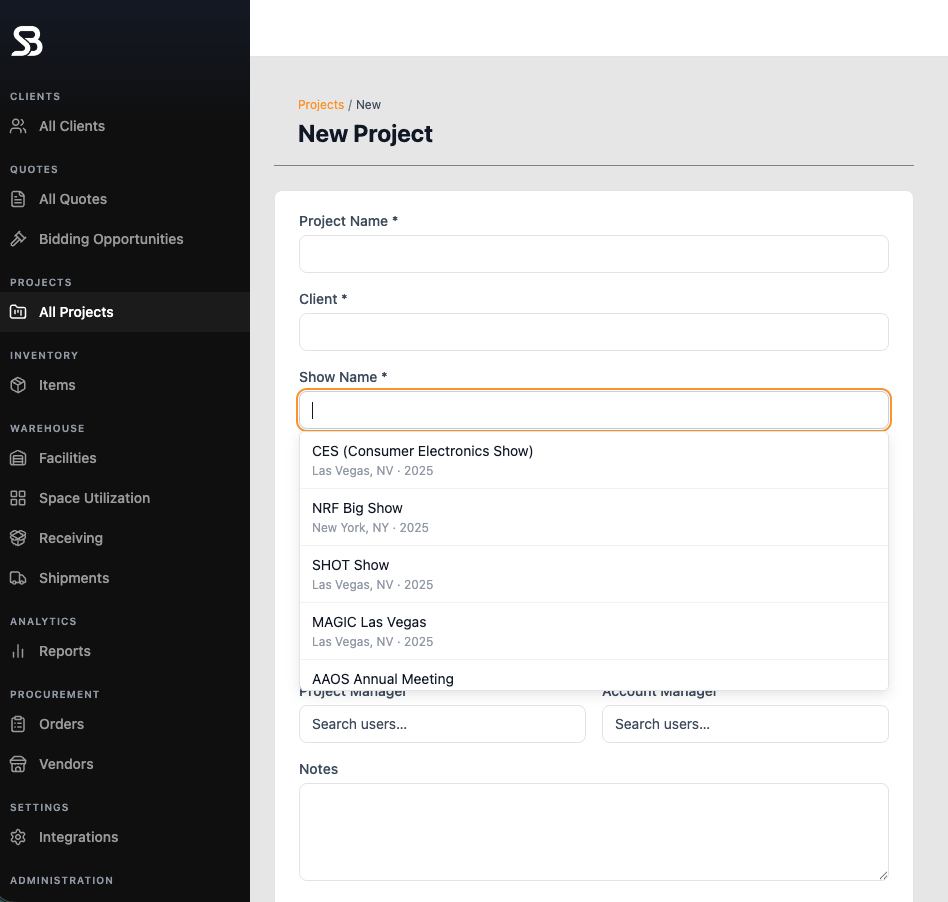
⚠️ If the show isn't in the list: it simply means it's not in ShowBase's
default database yet. You can create it manually — but to keep ShowBase's
show database free of duplicates, always follow this naming format:
[Acronym] [Full Show Name] [Year] Example: CES (Consumer Electronics Show) 2027
This new show will be saved for future projects too, so your team won't have to re-enter it — as long as everyone follows the same format.
Managing an Existing Project
Once a project is created, click into it from All Projects to access its full detail view. This is where your team manages everything related to that specific show — from documents to inventory to daily communication.
Overview Tab
The Overview tab shows all the key details you entered when creating the project: Client, Show Name, Venue, Booth Number, Show dates, Booth Size, GSC, and Notes. Click Edit (top right) at any time to update these.
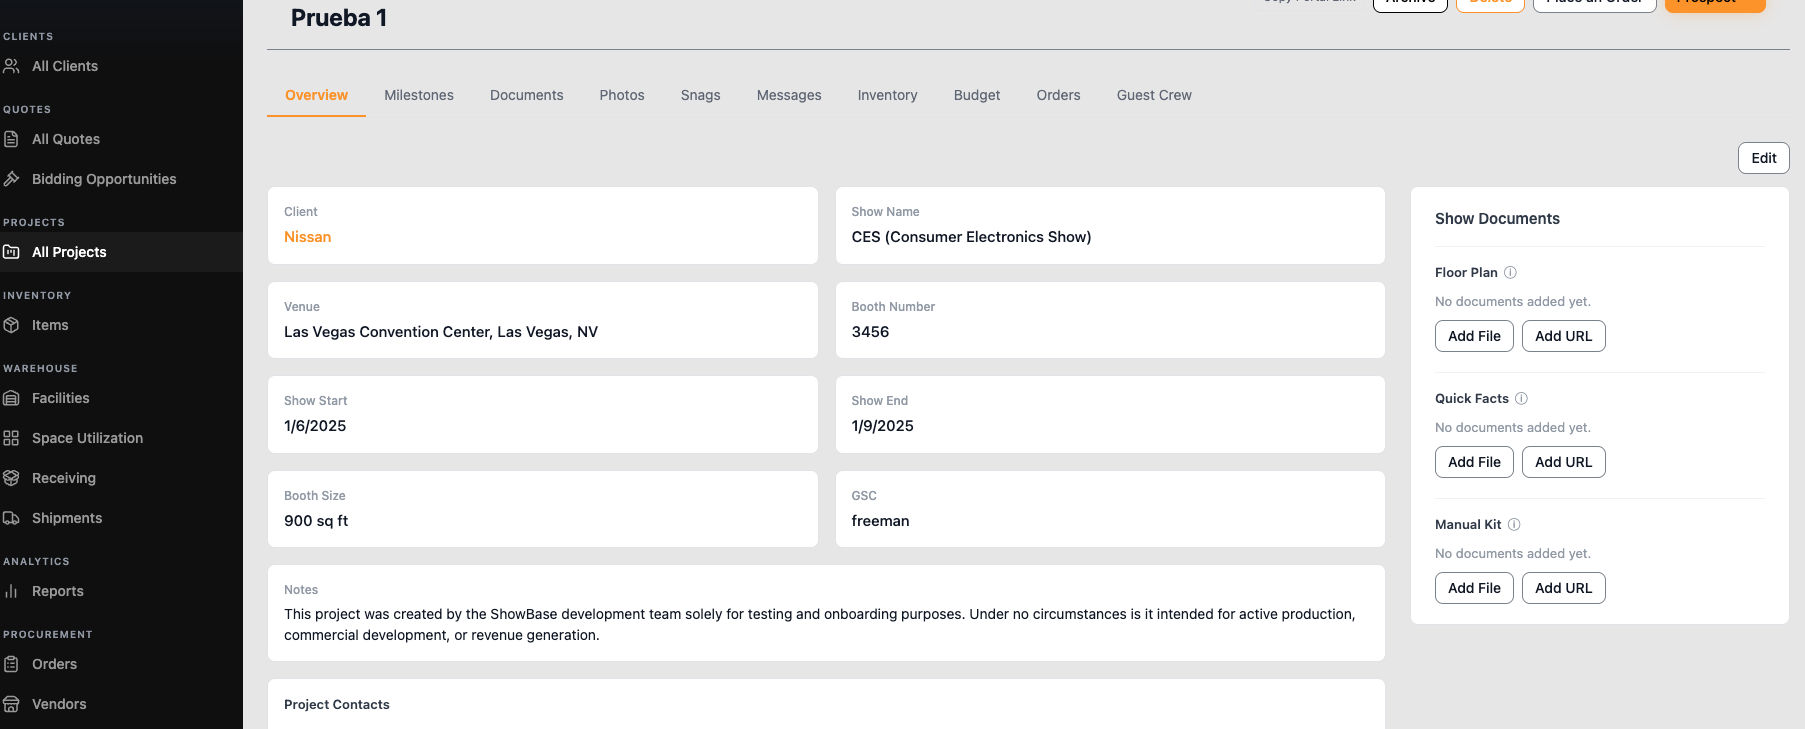
On the right side, you'll find Show Documents — this is where you upload official show paperwork provided by the show's decorator (GES, Freeman, Expo Group, etc.), such as:
- Floor Plan
- Quick Facts
- Manual Kit (Exhibitor Kit)
Click Add File to upload a document you've already downloaded from the decorator's website, or Add URL to link to it instead.
📌 Important — Public vs. Private Data
ShowBase works as a shared community across companies. Show Documents (Floor Plan, Quick Facts, and Manual Kit) are the only public information in ShowBase. Once one user uploads these for a specific show, they become available to any other user on ShowBase — even from a different company — so no one has to re-download the same decorator paperwork twice.
Everything else in ShowBase is private, visible only to your own company: clients, projects, budgets, inventory, messages, orders, and all other documents you upload are never shared outside your organization.
Milestones Tab
Milestones break the project down into phases (e.g., Initial Build, Logistics, Show Services, Show Build, Dismantle & Return), each with its own tasks, due dates, and status.
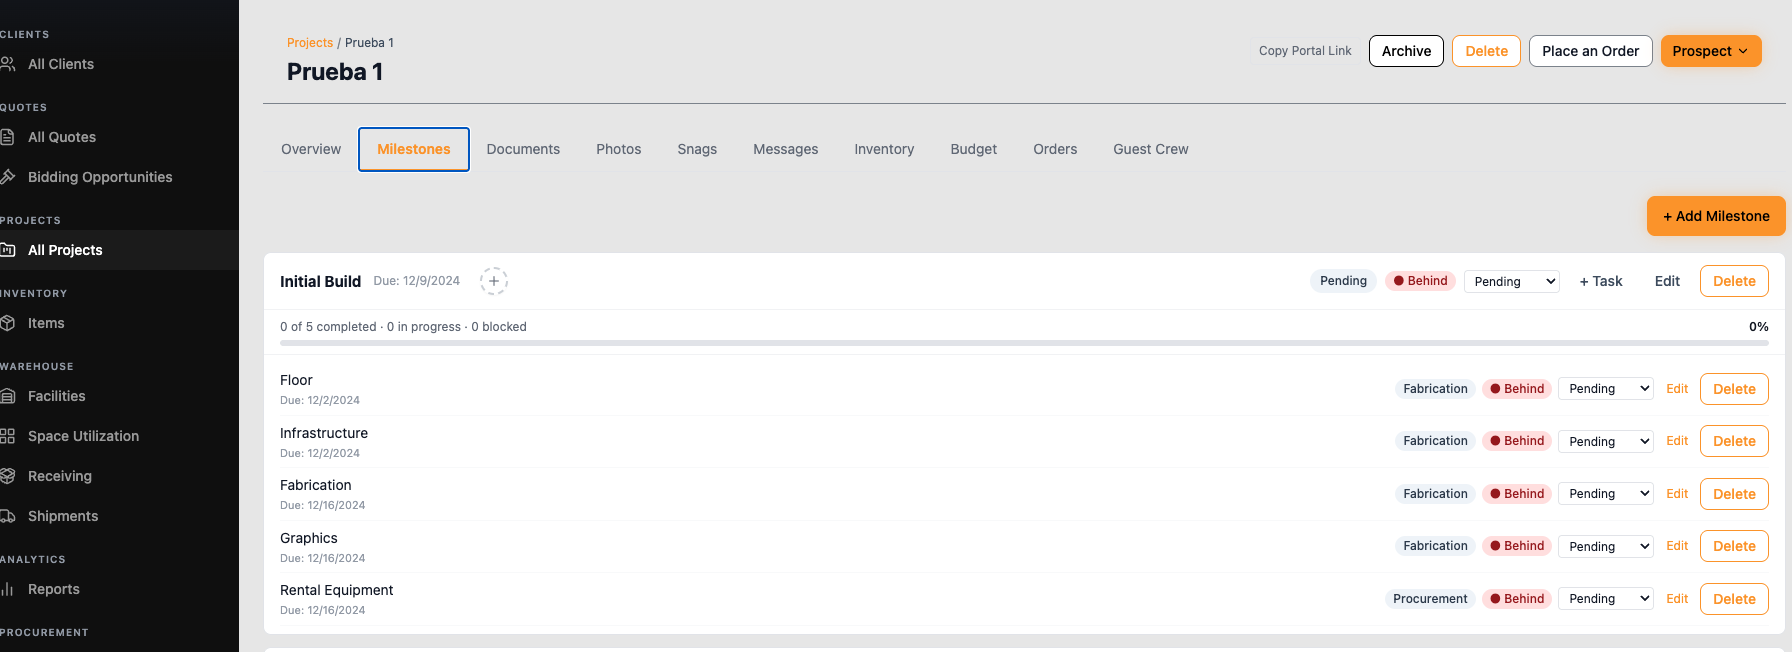
Each task shows a category tag (Fabrication, Logistics, Procurement, Documentation, InstallAndDismantle), a status flag (e.g., Behind), and a dropdown to update its status. Use + Task to add a new task under a milestone, or + Add Milestone (top right) to create a new phase entirely.
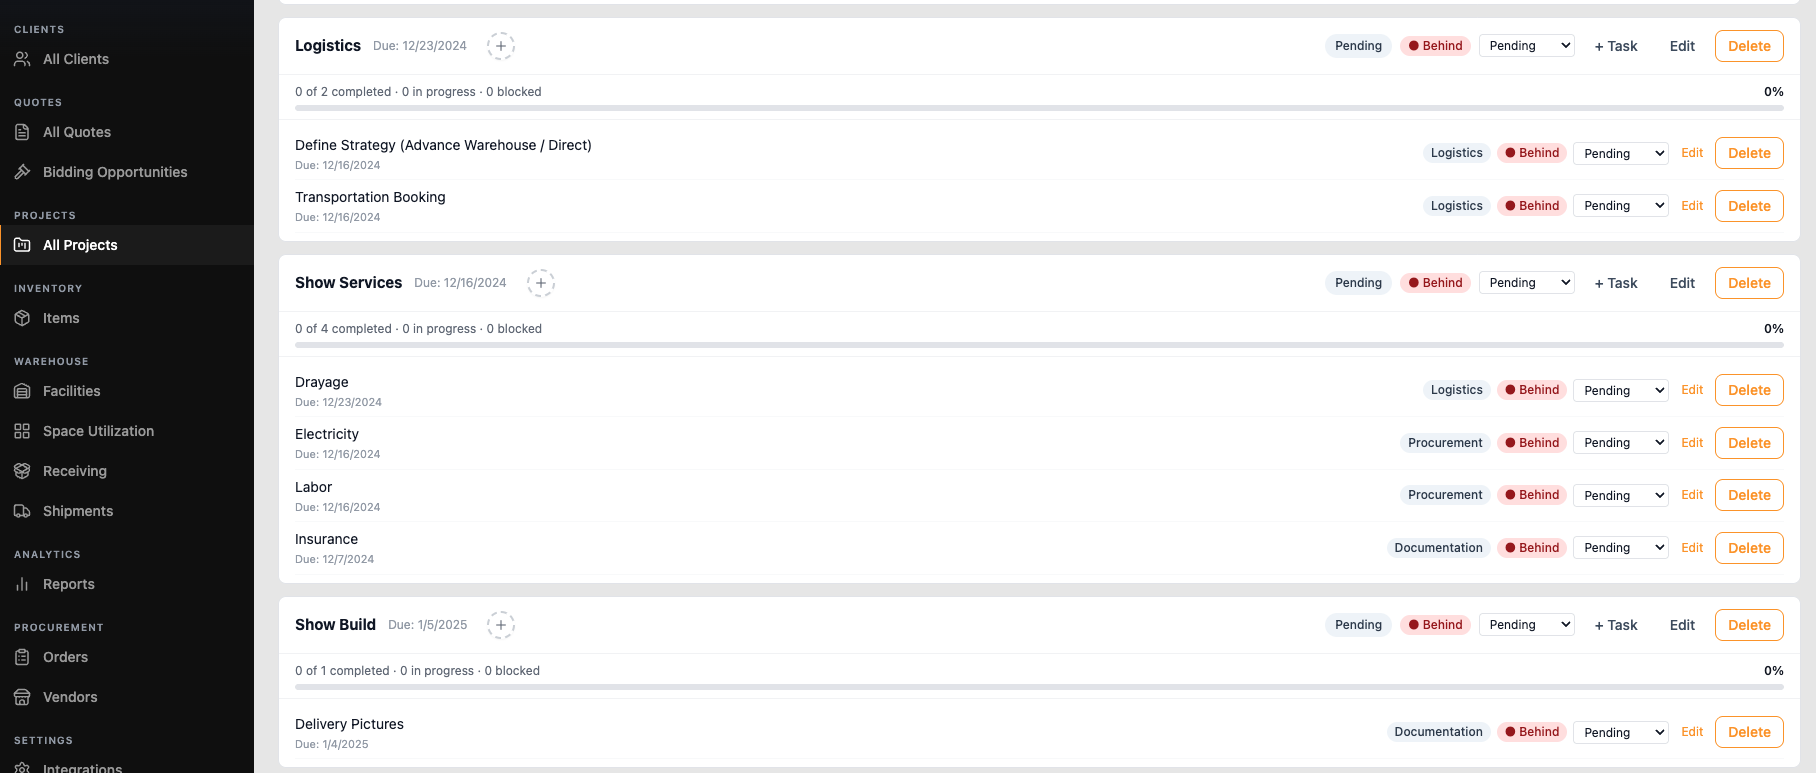
This tab is one of the most valuable tools for team coordination. Since everyone involved in the project can see it — Project Managers, Account Managers, and any other assigned team member — Milestones gives the whole team real-time visibility into how the project is progressing.
Instead of asking around or waiting for a status update meeting, anyone can open the project and immediately see which phase is on track and which one is falling behind. The "Behind" flag makes it easy to spot exactly where delays are happening — whether it's a fabrication task stuck in the shop or a logistics step waiting on transportation booking — so the team can react quickly instead of finding out too late.
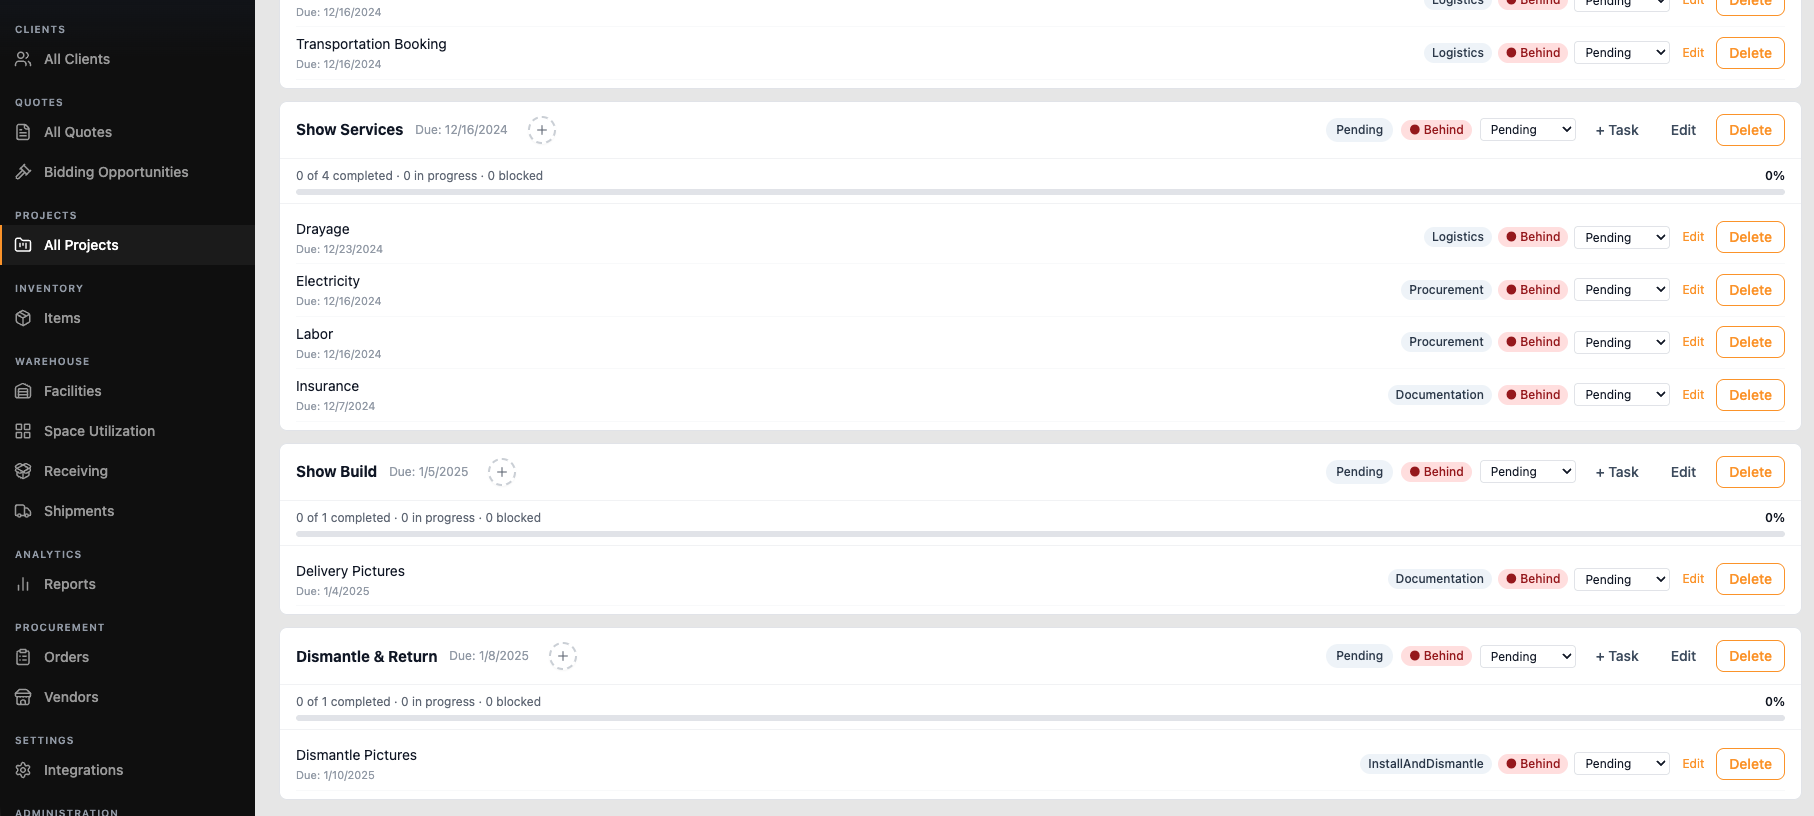
💡 Tip: Milestones are a great way to see at a glance which phase of the build is falling behind — the "Behind" tag makes bottlenecks easy to spot.
Documents Tab
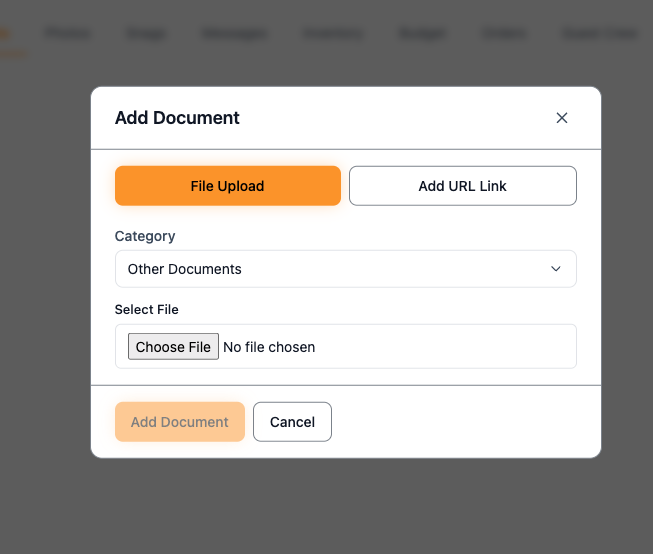
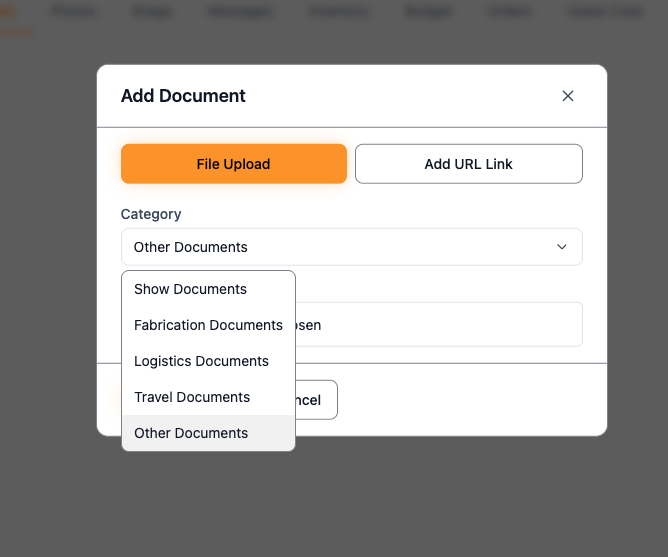
This is where you store project-specific files — separate from the public Show Documents mentioned above. When empty, it shows "No documents uploaded yet." Click + Add Document to get started. Choose between File Upload or Add URL Link, then select a Category to keep things organized: Show Documents, Fabrication Documents, Logistics Documents, Travel Documents, or Other Documents.
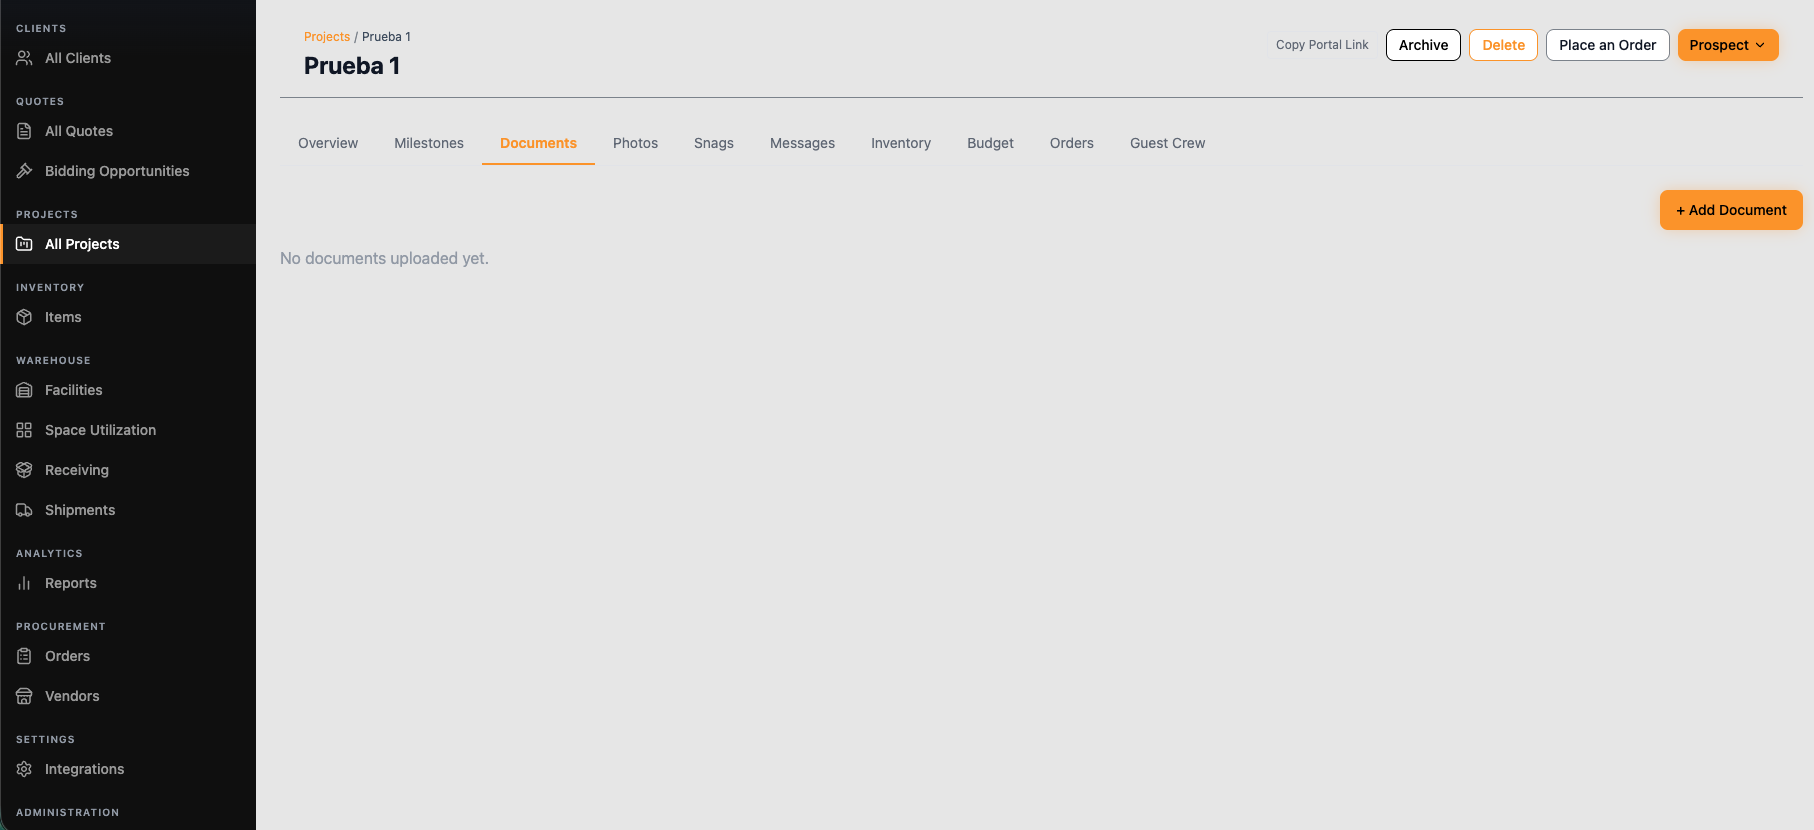
Choose between File Upload or Add URL Link, then select a Category to keep things organized: Show Documents, Fabrication Documents, Logistics Documents, Travel Documents, or Other Documents.
Photos Tab
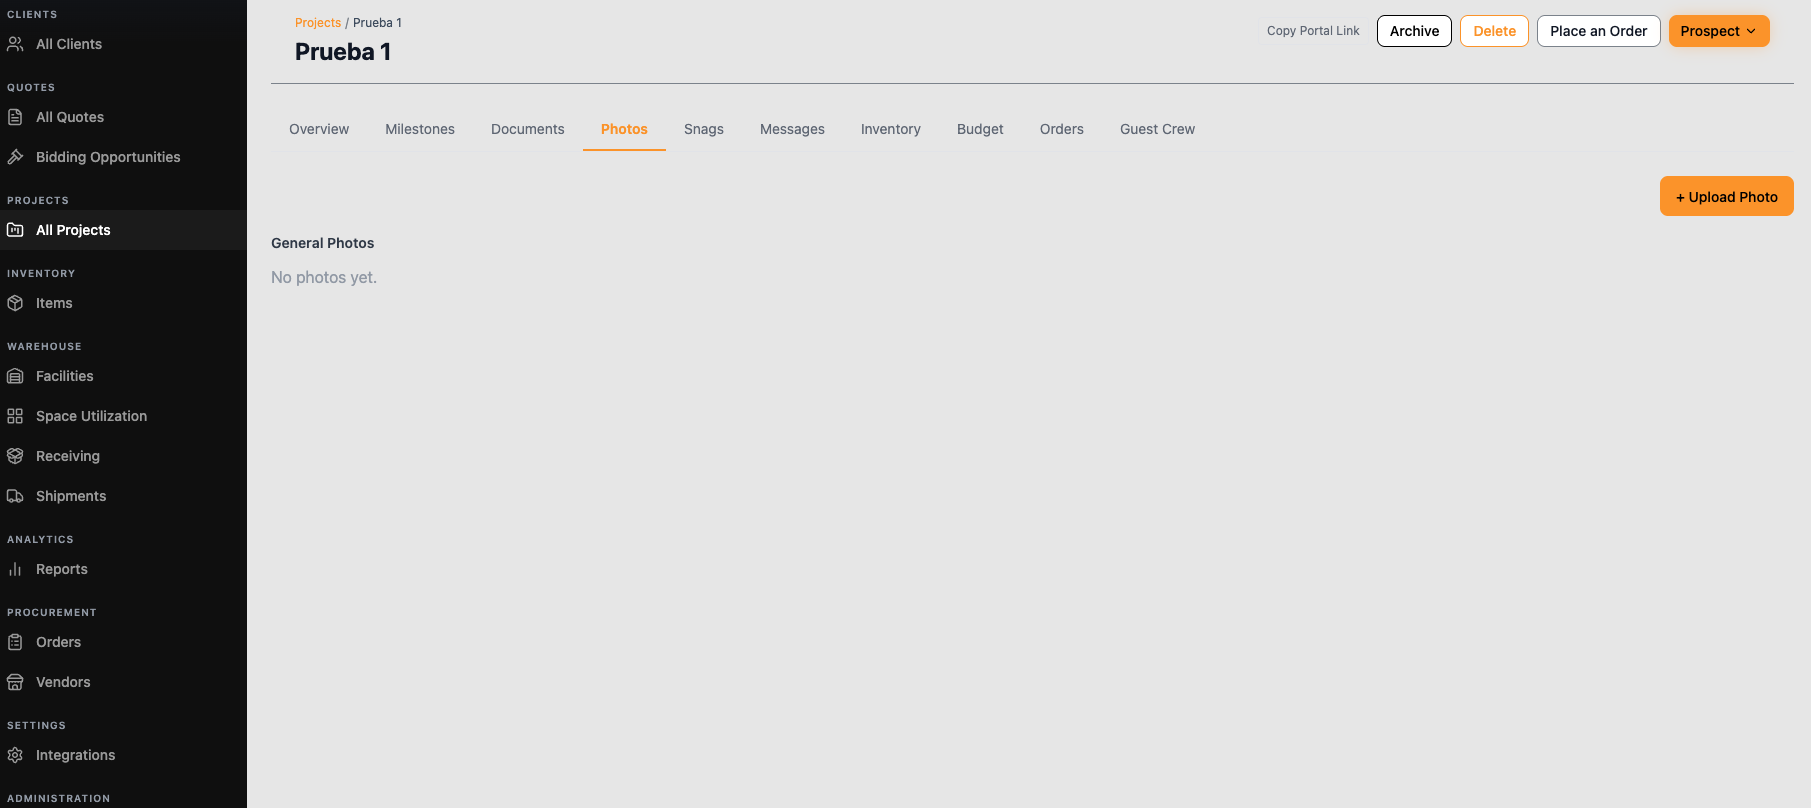
Use this tab as the visual record of the entire project — from the first site walkthrough to the final installed booth. Unlike Snags (which are tied to specific problems) or Documents (official paperwork), Photos is simply a running gallery of everything visual related to this show.
Common things to upload here:
- Booth design references or renderings shared by the client
- Fabrication progress photos (as pieces are built in the shop)
- Site/venue walkthrough photos before install
- Day-of install progress shots
- Final booth photos once fully built and set up
- Teardown/dismantle photos for records
Click the + Upload Photo button to add one or more images to the General Photos gallery.
Snags Tab
A "snag" is any issue or problem that comes up during the project — think of it as a mini punch-list. Click the + Report Snag button to log one.
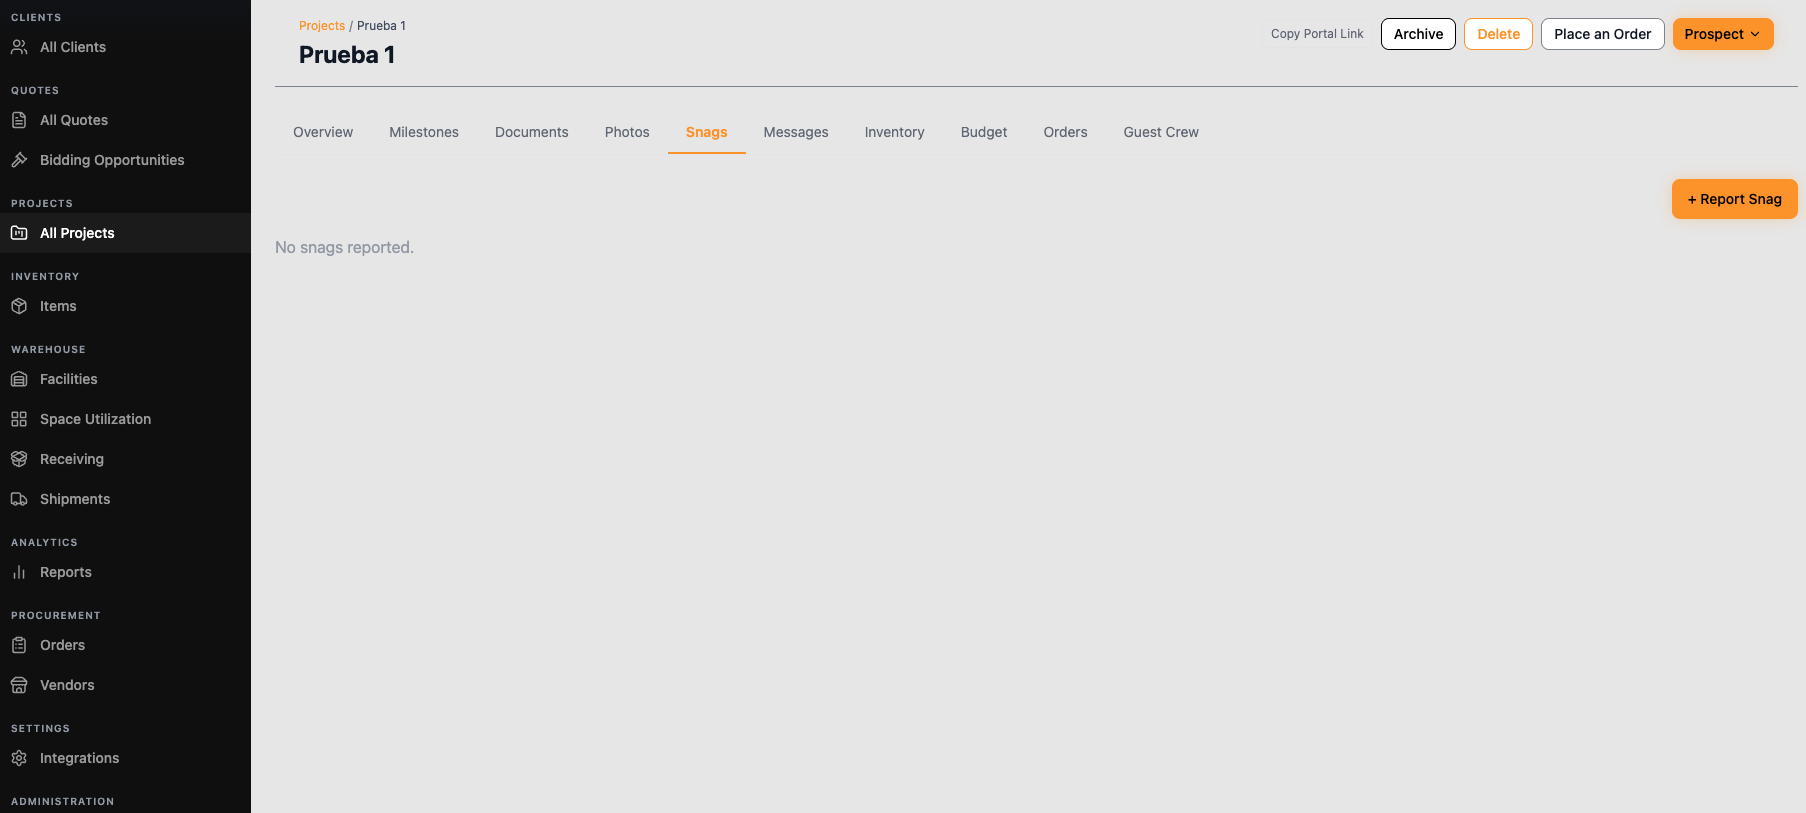
Fill in a Description, then select a Category: Fabrication, Transportation, At-Show Installation, Storage/Warehouse, or Other.
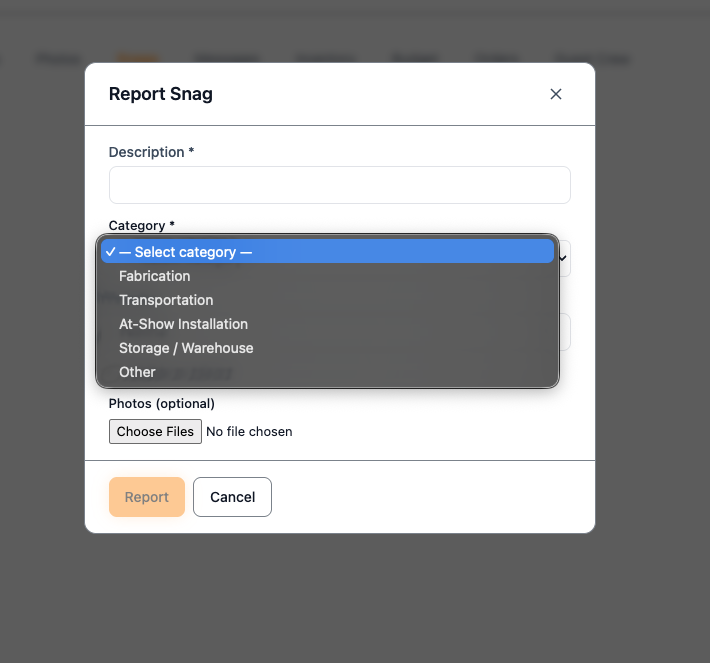
Set a Priority — Critical, High, Normal, or Low — so your team knows what to tackle first. You can optionally attach photos of the issue before clicking Report.
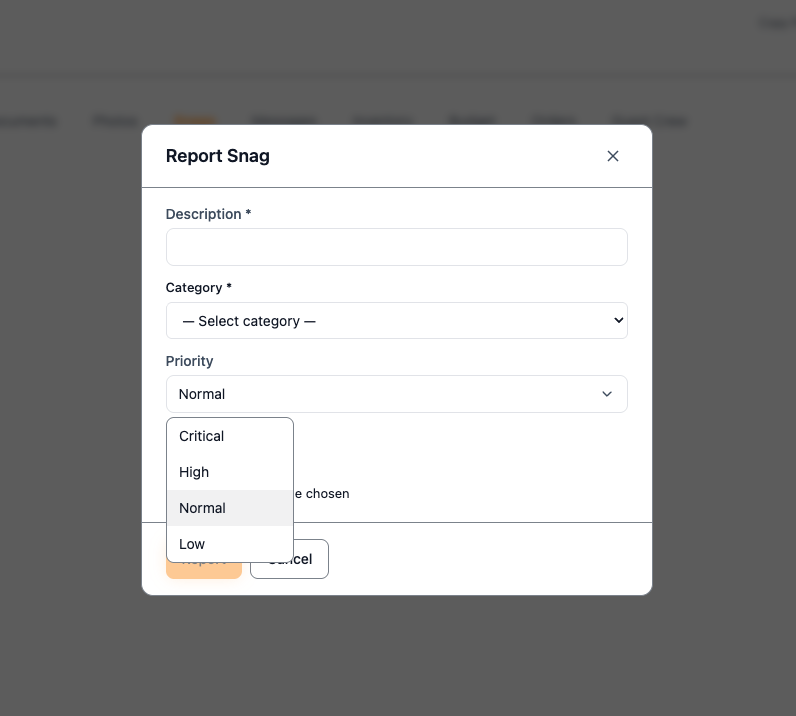
💡 Tip: Always set Priority honestly — if everything gets marked "Critical," the label loses its meaning and your team won't know what to prioritize first.
Messages Tab
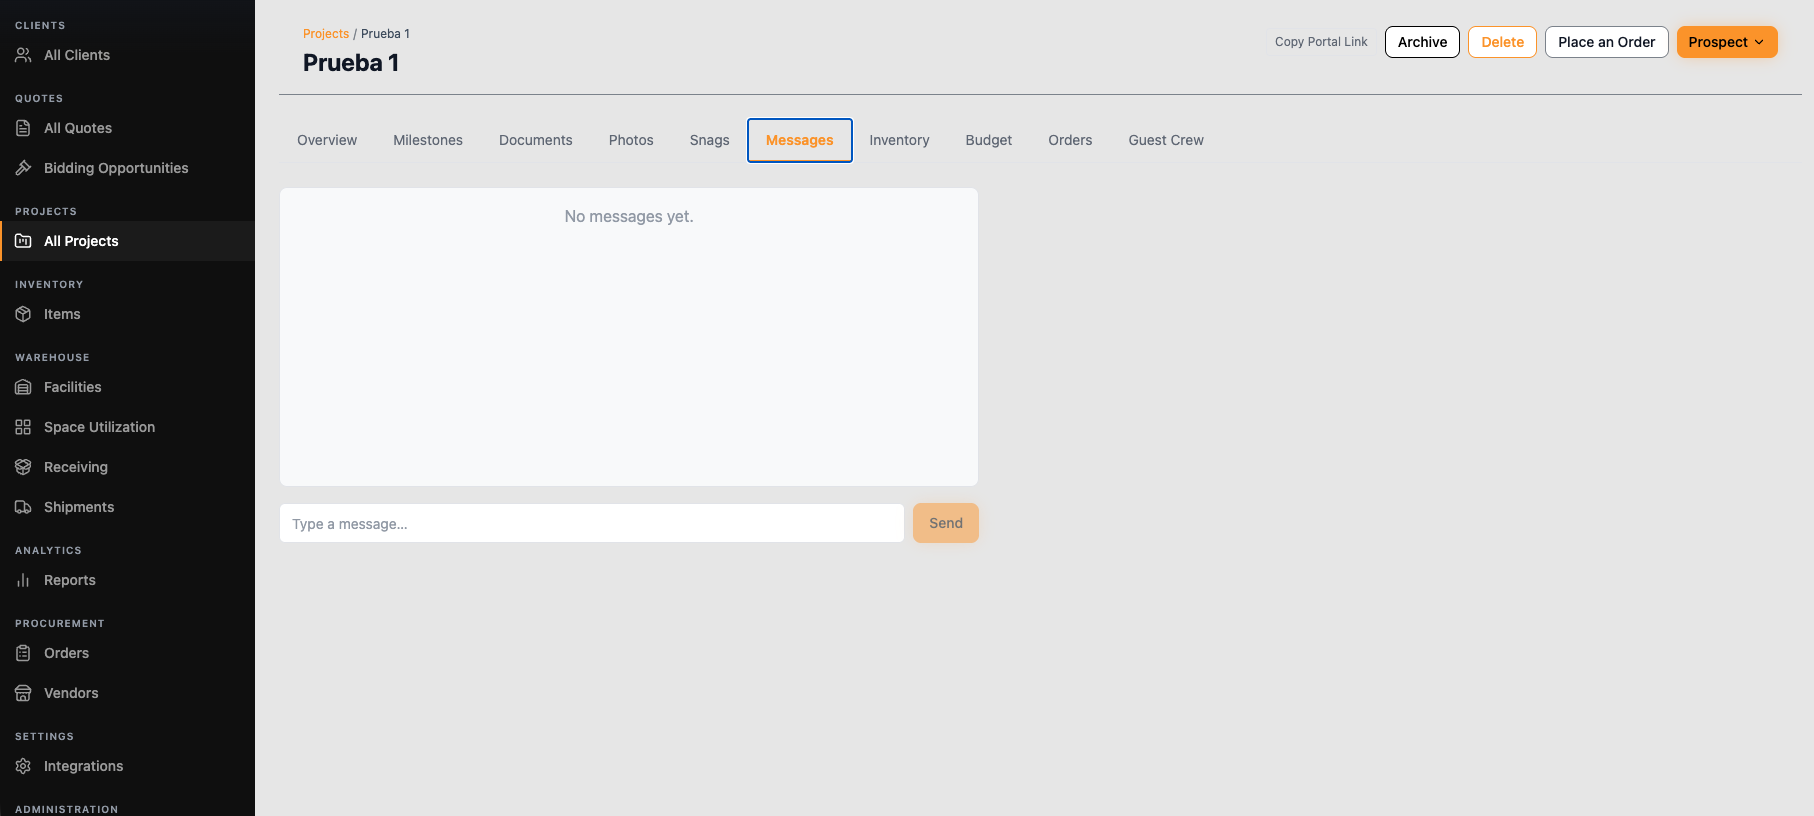
A simple project-level chat for quick internal notes and updates related
to this specific show. Type your message in the box at the bottom and
click Send.
Inventory Tab
Track which items are staged and reserved for this specific project. Staging Progress shows how many reserved items have been physically picked (e.g., 0/0 if nothing is reserved yet).
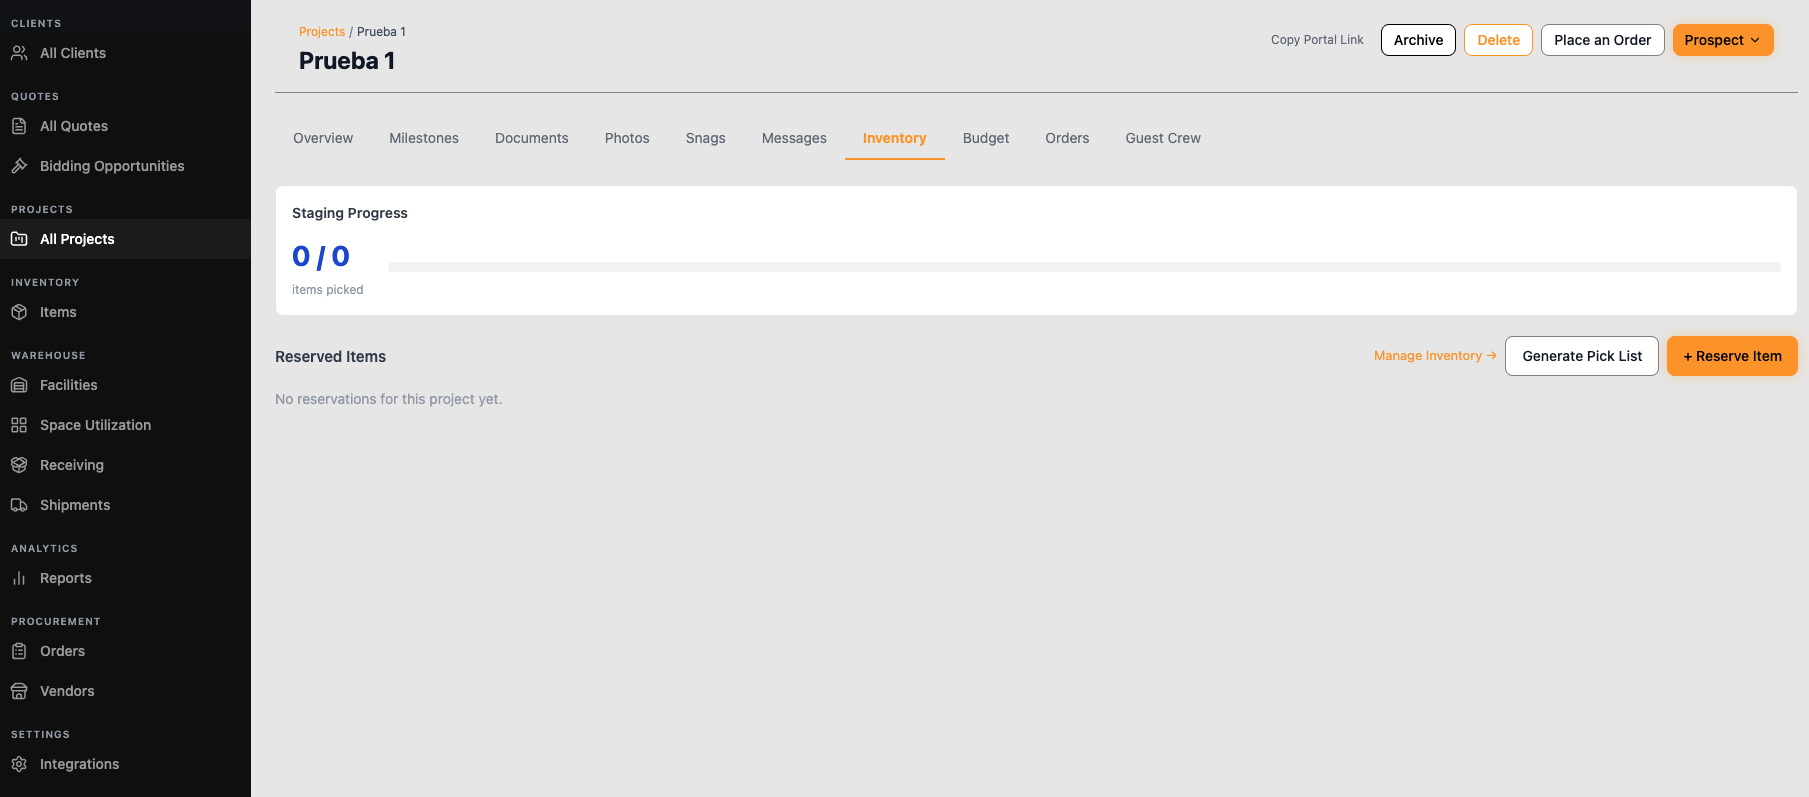
Click + Reserve Item to assign inventory to this project. Search for the item, confirm the Start/End Date (these auto-fill based on the show dates), choose the reservation Type (Hard/Confirmed or Soft/Tentative), and set the Quantity needed.
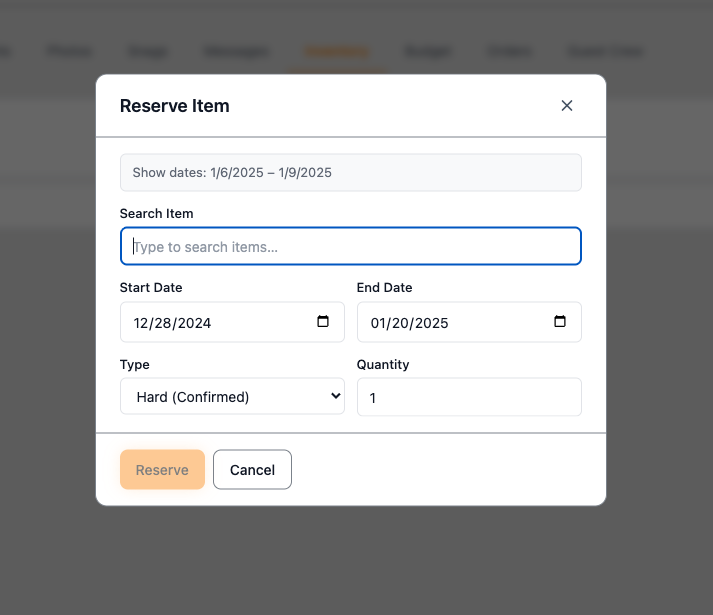
⚠️ New to ShowBase? You can only reserve items that already exist in your company's inventory. If this is your first project, the item search may come up empty — that's because inventory hasn't been set up yet. See the Inventory article to learn how to add your items before reserving them here.
Budget Tab
Track project costs here. If the project has an approved quote linked to it, expenses may pull in automatically — otherwise, you'll see a message letting you know no quote is linked, with the option to start tracking costs manually.
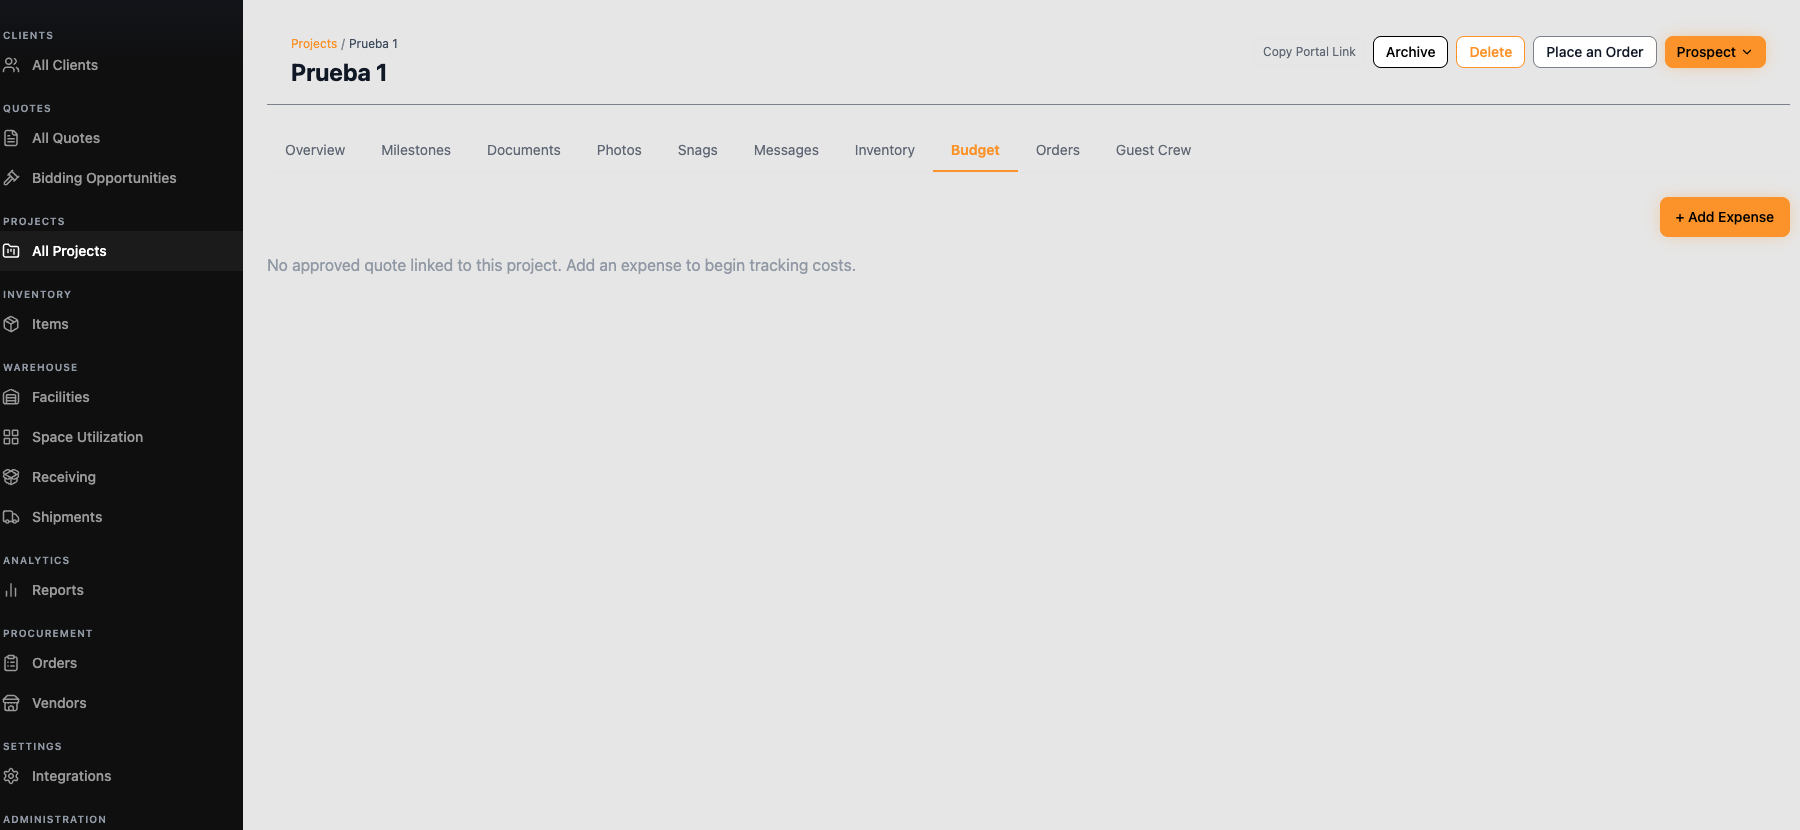
Click + Add Expense to log a cost. Fill in the Amount, a short Description, a Category (type to select or create one), and the Date. You can also attach a receipt or invoice under Attachment.
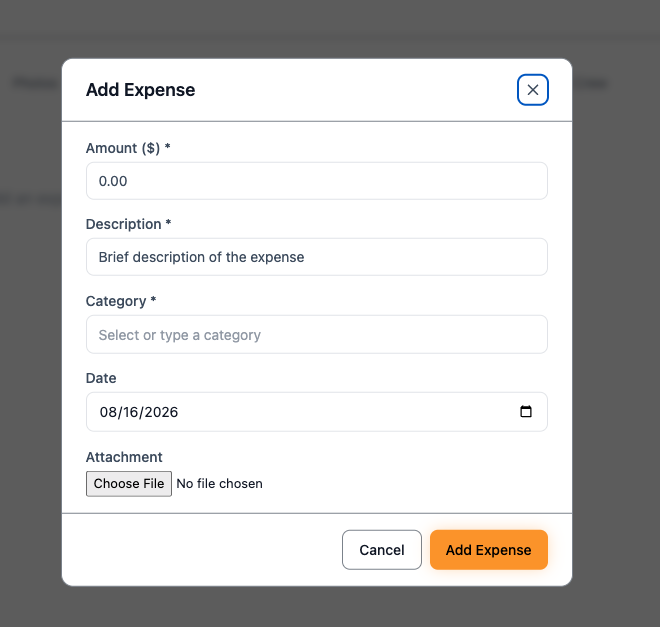
💡 Tip: Get in the habit of attaching the receipt or invoice file whenever you log an expense — it saves time later if you ever need to reconcile the budget against actual vendor invoices.
Orders Tab
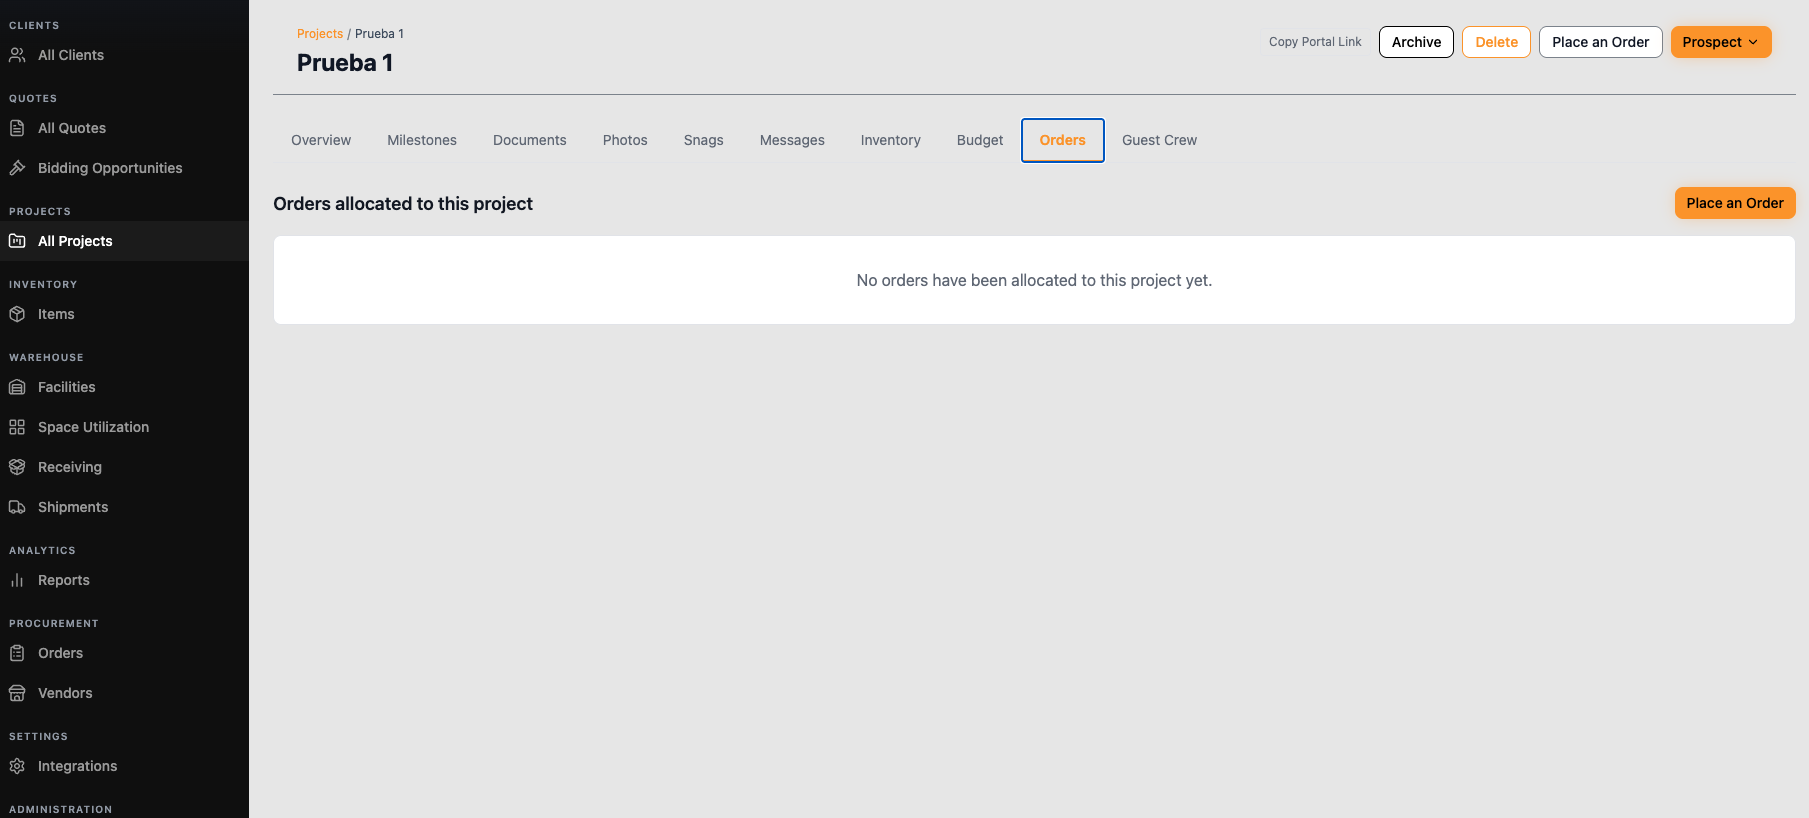
This tab shows every order placed for the project. When empty, it will say "No orders have been allocated to this project yet." Click Place an Order to start a new one.
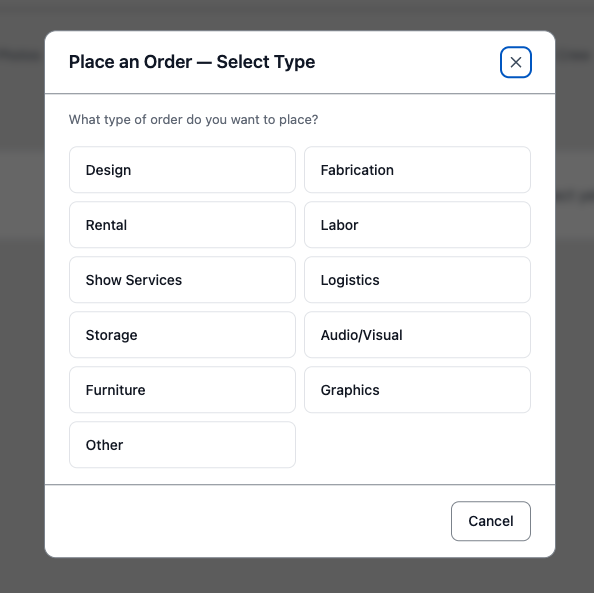
ShowBase will first ask what type of order you're placing: Design, Fabrication, Rental, Labor, Show Services, Logistics, Storage, Audio/Visual, Furniture, Graphics, or Other.
⚠️ Before placing any order: the vendor you want to order from must already exist in ShowBase. See the note on Vendors below before continuing — otherwise you won't have anyone to send the order to.
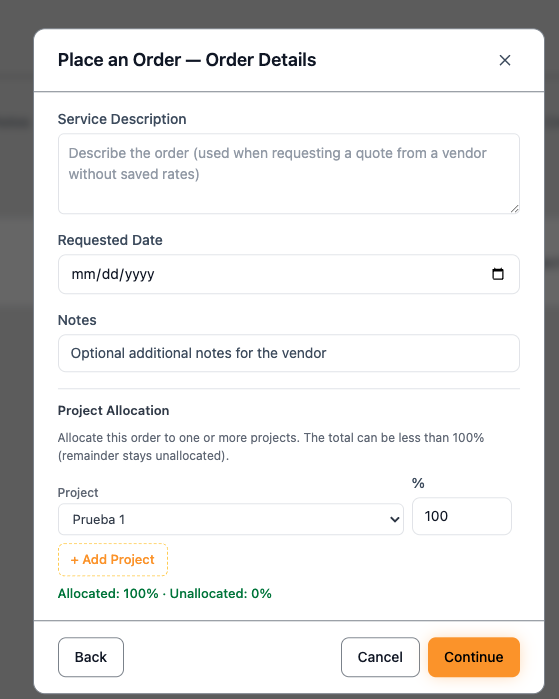
Under Project Allocation, you can split a single order across multiple projects — useful when one vendor order (e.g., a shared freight shipment) covers more than one show. Click + Add Project to split it, and assign a percentage to each. The total doesn't have to reach 100% — any unallocated amount simply stays unassigned.
Setting Up Vendors
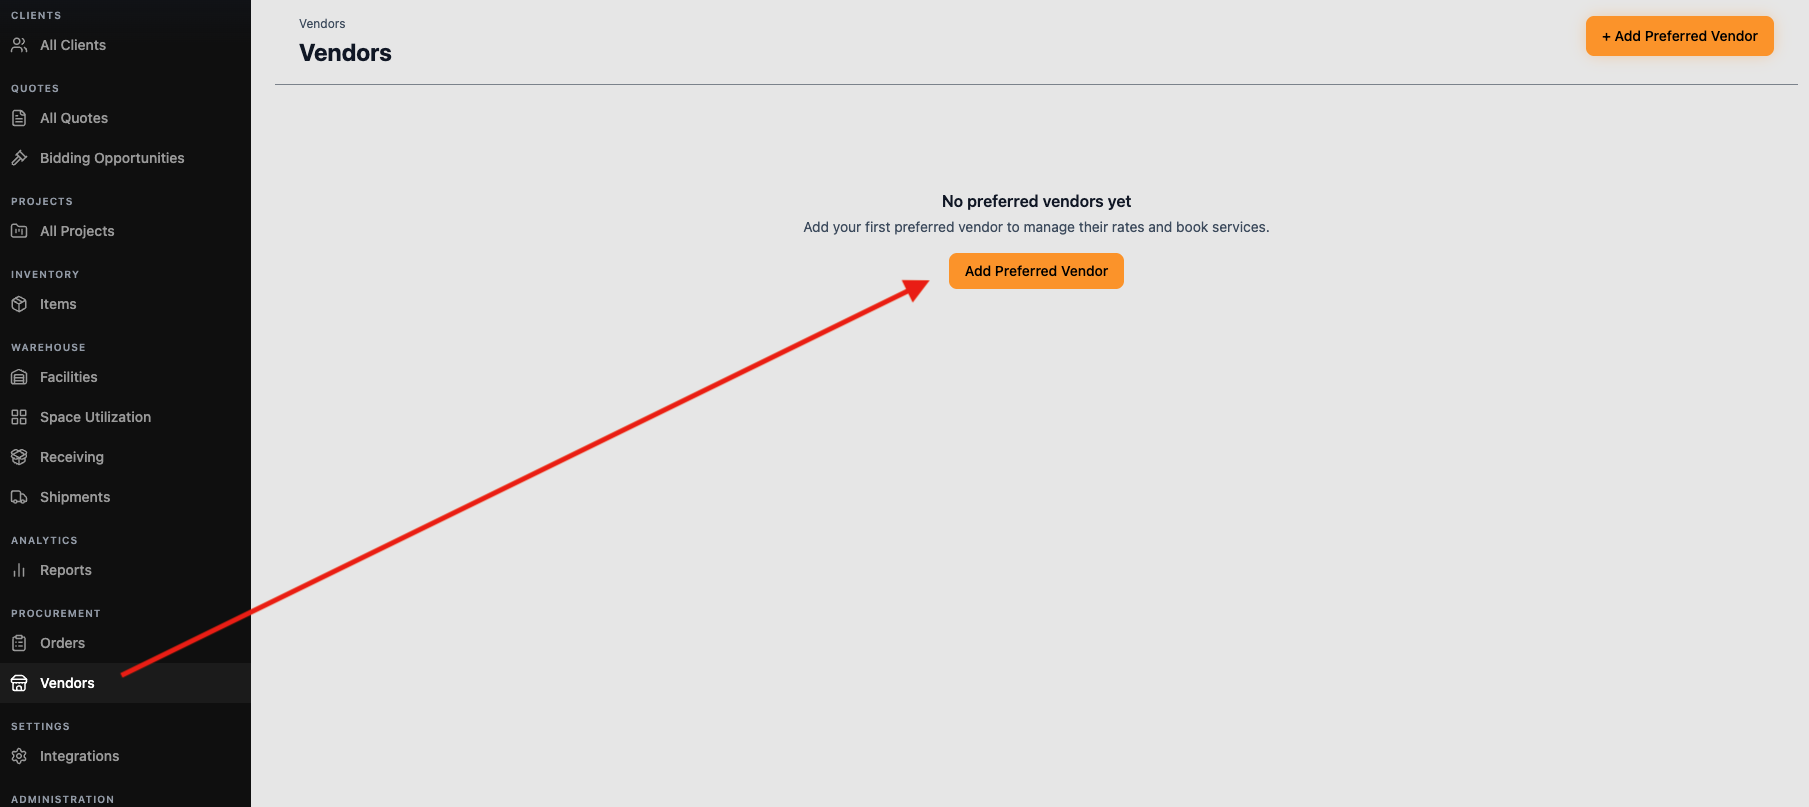
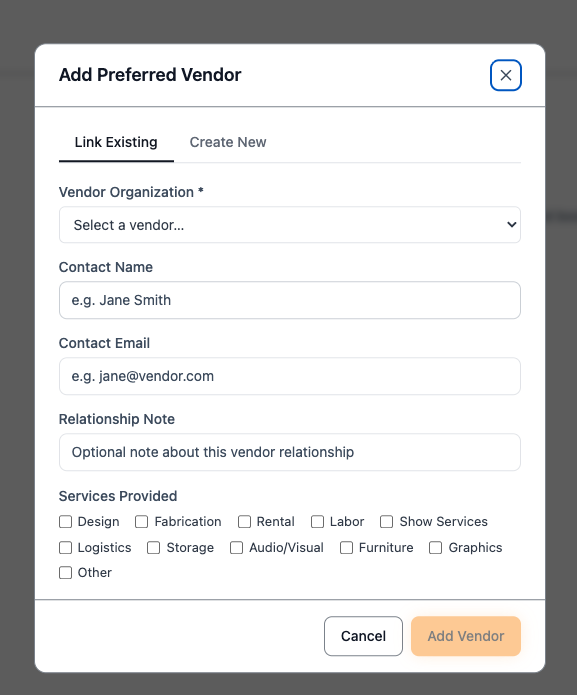
Before you can place any order, the vendor must exist in ShowBase. From the left sidebar, click Vendors (under Procurement) to manage this. Click + Add Preferred Vendor.
Check off the Services Provided by this vendor (Design, Fabrication, Rental, Labor, Show Services, Logistics, Storage, Audio/Visual, Furniture, Graphics, Other) so they show up correctly when placing future orders.
Guest Crew Tab
Guest Crew gives temporary, restricted access to people who need to be involved on-site but shouldn't have a full ShowBase account — think freelance installers, day-of labor, or client reps helping during the show.
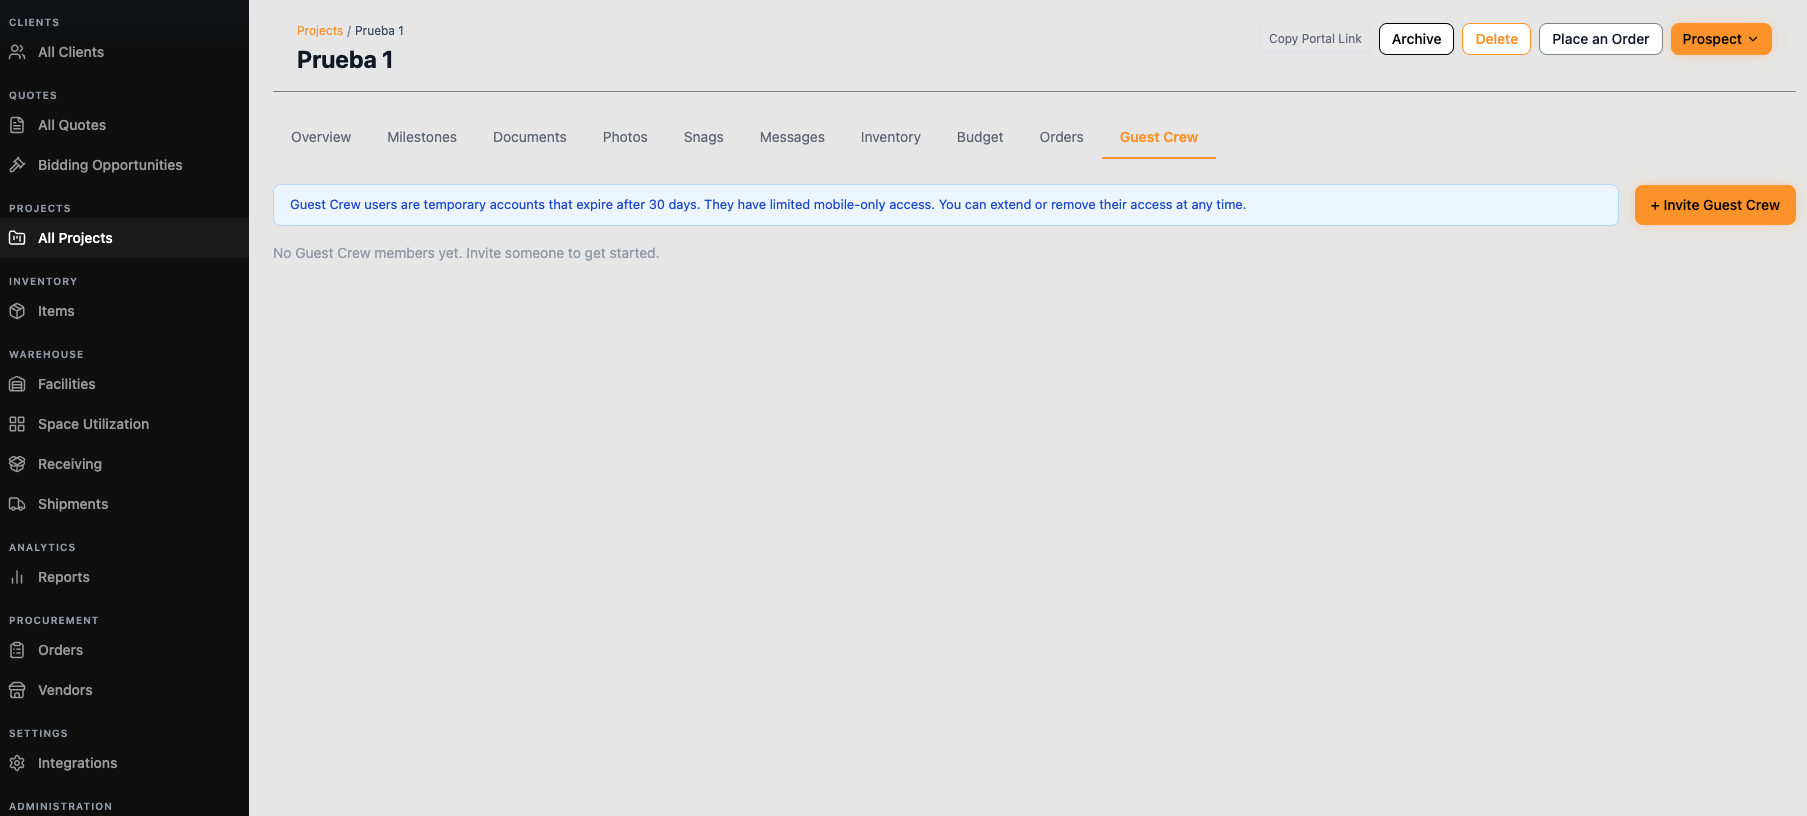
Click + Invite Guest Crew to add someone. Enter their Name and Email — their Role will default to "Guest Crew."
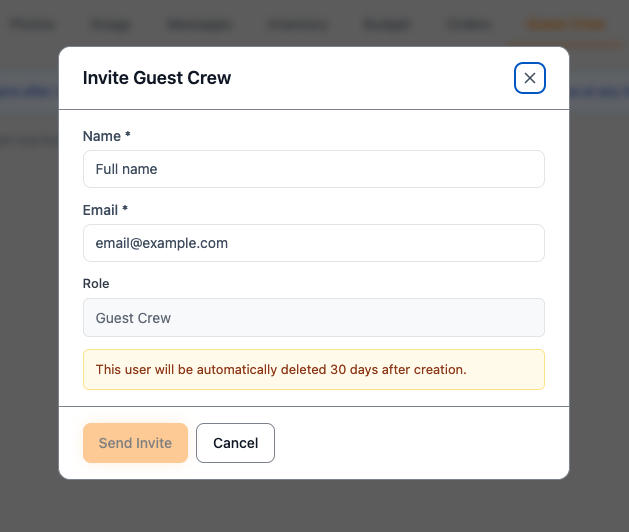
Once invited, the person receives a link by email to access the platform directly from their phone's browser — no app download required. Their access is restricted to only the project they were invited to; they won't see any other clients, projects, or company data.These accounts are temporary by design: they're automatically deleted 30 days after creation.
💡 Tip: You're not locked into the 30-day limit — you can extend or remove a Guest Crew member's access at any time from this same tab, so it's safe to invite someone even if you're not 100% sure how long they'll need access.
⚠️ Note: Guest Crew access is limited to a single project and basic on-site functions — it isn't meant for building quotes, managing budgets, or other full-platform work. For that level of access, that person needs a regular ShowBase user account instead.